|
|
| 4" Superlift Suspension Installation - part #1 |
| |
I have always loved lifted Jeeps. I used to see them as a kid and I swore when
I had the time, effort, and financial security that I was going to have one. Growing up, you drove what you had
to because of reliability and affordability. But now, I was going to have one that I could call my own and I
was going to make sure it was done right, so I was going to build it.
After much research, I decided on a 4" suspension lift would be the best to keep all the drive-line angles in
check and I would get a little added lift in the way of shackles and a body lift kit. I wasn't going to go
very crazy on those, so the majority of the lift was going to come from the springs. Spring under is how it
came from the factory, so that was how I was going to leave it. I toyed with the idea of a Sprung Over lift
which would give more lift and such, but it introduces a bunch of other variables, so this being my first lift
installation, I was going to KISS it (Keep It Simple Stupid). This was a very good idea to start with because
it kept it relatively simple. Now that I have more experience, the next one will be SOA
(Spring Over Articulation), or maybe I will upgrade the current Jeep... Hmmmmmm...
|
| |
|
|
| |
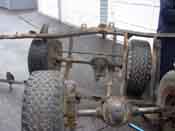
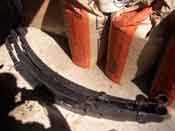
| I had the Jeep 100% disassembled and took off the old springs. These were
totally shot and not even worth selling on
eBay. Scrap metal was about the only
good they would do for me. I ordered up a complete lift kit from
eBaythat included 4 new springs from
Superlift that had 4" of lift in then, a new drop pitman arm that would account for the power steering conversion
to keep the steering geometry in check, a transfer case drop kit to lower the angle of the drive shaft from the
transmission to match the spring perch shims that were on the rear springs, 4 new Heckthorn shocks with orange
booties, and finally all the hardware that would be necessary to bolt it all together.
|
| |
|
|
|
|
| |
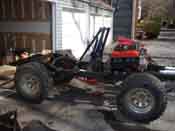
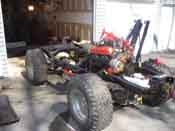
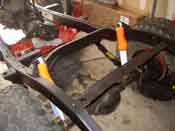
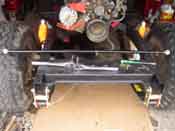
| With the frame sandblasted and coated with 8 coats of
zerorust, the assembly began. As stated earlier, the
majority of the lift was going to be in the new 4" Superlift Springs, however, another 1" would come from the
Heavy Duty Shackles. These were obtained from Daystar and feature greaseable bolts that have nipples on the
end. The came complete with polyethylene bushings and I purchased some poly grease to ease with the assembly.
The Suspension lift kit also came with polyethylene bushings as well; so liberal poly grease was applied to
avoid future squeaking of the suspension parts.
|
| |
|
|
| |
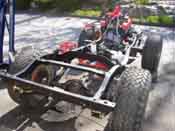
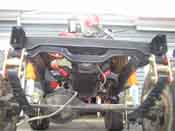
The springs only go on one way and 2 of them have degree shims on them for the
rear axle degree correction with the suspension lift. The get bolted on and torqued down to the frame mounts.
Make sure the frame mounts are in good shape and don't need any attention from the welder.
Once everything is snugged but not tightened down all the way to allow for adjustment, make sure everything
checks out with the shackles and springs and u-bolts. I purchased some new lifted bump stops as well since there
were original ones on there but they had deteriorated. 4 of them went on the frame and were poly as well and 4
of them went on the axle tubes inside the new u-bolts. The 4 Heckthorn shocks were then assembled and bolted
into place and everything was torqued down the appropriate specifications. The shackles were lubed up through
the nipples on the bolts and the installation was nearly complete.
|
| |
| Last |
Next >> |
|

