|
|
| Tear Down / Evaluate Vehicle - part #3 |
| |
Body separated, we were ready to check out what was up with the rig. I dropped the
gas tank and removed all the gas lines and brake lines as they were going to receive an upgrade to stainless steel
ones (part #531021). I got them from 4wd
and they worked out great. Classic Tube The link
shows the company that makes them; I just got them from a wholesaler. After that was done, the exhaust was cut
off and the exhaust manifolds were sold since I was planning on running headers. Now this is a tricky area in
that my rig is a 1976 and it is considered emissions exempt in CT. As of this writing, CT doesn't even have its
emissions program ironed out, but this is beside the point. Check with your state laws. Some don't require
catalytic converters, some do, others say they have to be on there but not functional, anyways, figure it out
before you go and cut yours off and toss or sell it, it may have to go back on. Also, the Y pipe on V8-304
motors is quite valuable since they don't make them anymore from what I have seen. If this is good of fairly
good it can be reused or at least be used to make a template for your exhaust mockup.
So, you say you want to do something stupid like me. Well you first have to
start out with taking apart a Jeep, not having a ton of space to put the broken down project in, run out of
daylight, live in a condo complex and then shove all the stuff in the garage at the end of the day in the rain.
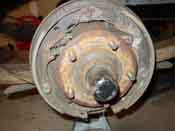
In your haste, you put the rear axle on it's side and come back in the morning and see that your axle seals are
shot and then you have your drum swollen with gear oil. I guess that is when I decided that I would do 1-piece
axles in the rear after all I read about the AMC Model 20 axle not being all that strong. With the drums all
oily, I knew that the swollen brake hose to the rear and the clogged brake lines were not going to be my only
problem in stopping. I knew now with the drums all torched that I was going to have to go for new hardware in the
rear. Stupid mistakes costs lots of money, don't do like I do, do something better and learn from my mistakes.
|
| |

|

|
| |
|
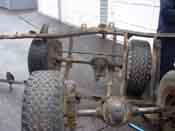
The separation of springs and rubber mounts from the eyeholes in the leaf springs and the perches was a joy.
This was 30 years of dirt and grime packed into a worn in cavity. A little fire showed them who was boss. That
as well as a big hammer and chisel. In the pouring rain this is no fun, I wish I had more room in the garage to
have done this. This is where I chose to go with polyethylene bushings. I won't have this problem in the future
with the liberal application of grease I put on there. Remember, this step is important to avoid squeaking of the
suspension.
|
| |

|
|
| |
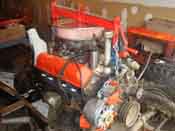
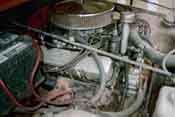
| With all that done, the motor was next to come out because I tried very hard with a sander, grinder, and some
drill attachments to clean up the frame and get it down to bare metal to see
if there were any holes anywhere. This didn't work at all except for a very small area and I went through a
lot of cleaner, paper towels, and sandpaper. Sandblasting or media blasting was the way to go and there are 2
options here, either, wrap up the engine and blast the area around it, or take the motor out, separate the axles
and blast away. NOTE: I was planning on putting on a 4" lift of some sort, so I knew that I could
take off the axles and separate everything without worry. A point of
eBay note here. The old springs were
heavy; if you plan on selling things, make sure that you see how much you will make for your effort and most
importantly PACKAGING. Just because you can sell something, doesn't mean that you should sell something.
|
| |

|

|
| |
| Lessons Learned the Hard Way |
| |
So, my lessons learned here would have to be number one that I didn't have enough
garage space to take apart a Jeep. You really need more then a one-car garage. You really need a 2-car garage so
you can take it apart and lay the other stuff on the other side. Now this is where a wife or non-understanding
significant other will come into play. They will require lots of attention when you are not in the garage or you
will end up sleeping on the couch and not getting any.
The other major lesson learned was that I was going to need to spend a lot of money at this stage of the project.
This is where the slowdown occurred in the lack of financial planning. In the time department I had plenty, but in
the cash department I had none. I vowed to not let myself go into debt on this project. Remember your basic
guidelines in the project and stick to them or else you will have a huge credit card bill and no way to pay for it.
I gave myself a monthly allowance. If I didn't have the money to buy something, it waited until the next month.
This is why projects of this nature take so long: simply put... time and money. You can never have enough of
either of them.
|
| |
| Conclusions |
| |
Number one, get a bigger garage. Number two, Rear axles were designed to roll on
the road, not stand up on end.
That being said, the teardown was complete. Now it was on to sandblasting the frame, putting the motor together
after cleaning it up and getting it the way I wanted it to be and then finally onto reassembly. The putting it
back together process involved the great expense of the suspension components. I was able to attain a 4" lift off
of eBay for a good price and that
came with shocks. Heavy-duty 1" lift shackles helped to clear the 33" tires even better then before. Combine
this with the 1" polyethylene body mount spacers I had purchased and the rolling chassis was going to be great.
|
| |
| << Previous |
First |
|

